Subject areas provide one more level of grouping for mapping specifications. You can create a subject area within a project or within another subject area. Ensure that the subject area names are unique under each project.
Subject Areas
To create subject areas, follow these steps:
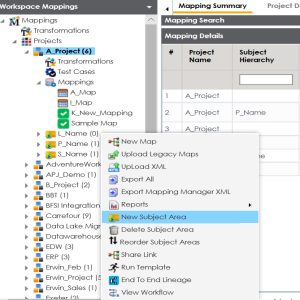
- In the Workspace Mappings pane, right-click a project.
- Click New Subject Area.
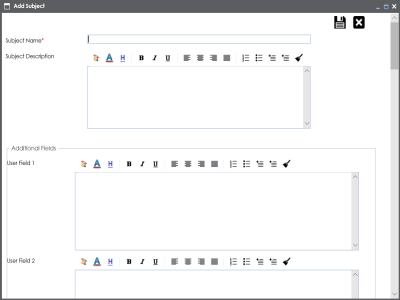
- Enter the Subject Name and Subject Description.
- Subject Name: Members.
- Subject Description: This subject area is created to arrange the mappings logically.
- Click
 .
.

The Add Subject page appears.

For example:
You can use additional fields and define UI labels in Language Settings.
The subject area is saved and added to the project.
Nested Subject Areas
You can create subject areas within another subject area. These subject areas are called nested subject areas.
To create nested subject areas, follow these steps:
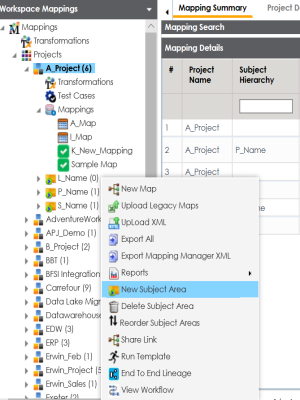
- In the Workspace Mappings pane, right-click a subject area.
- Click New Subject Area.
- Enter the Subject Name and Subject Description.
- Click
 .
.

The Add Subject page appears.

You can use additional fields and define UI labels in Language Settings.
A subject area is created under the subject area.
Once a subject area is created, you can enrich it further by Tagging Subjects.
|
Copyright © 2022 Quest Software Inc. |